How to Fix Black Screen On Windows 10

Windows 10 is the best operating system, but some fault so we are showing you how to solve the black screen Windows 10 problem. Windows 10 is a worldwide used operating system all over the globe and is designed from the glebe up to be user-friendly and simple to get along with. But, this does not mean it is good. There are many issues in Windows 10 and we are going to be seeing, and solve the issues Black screen of death on windows 10. 

If you give the speed of windows 10 then look no ahead than our fast guide, and your self protect online you first sure find VPN and protect your self.

In the installation time how to fix Black screen windows 10

In the installation time if you may be going to a black screen of Windows 10, you depending on your hardware, that means installation is going on in the background. 

In these steps, the first step is your computer in this situation to leave the black screen for up to 6 hours because your computer is slow. In your device, your device hardware is much better that work will be done fast. If anything does not change your computer, you just need to force shut down, hold power button just 10 seconds. Unplug every connecting device, after then try to reboot your computer up again and restart the installation procedure. If you face the problem in the current time you try to install windows with the help of bootable USB drive. 

Check out monitor’s connections

It is not comfortable just like sounds silly, but a very simple solution is a good one. Make confirm and you check the all connections monitor and PC, and monitor’s electric cable.

You must check your monitor is on it is not displaying stand light, it is the problem with power cable and issue with the monitor itself.

Power light is on but you can not find a signal from your computer, then after you try another cable or another connection.

Force your display to start

It is maybe possible windows 10 is not detecting or found your display. Then you use the keyboard to press the Windows key + Ctrl + Shift + B its forcible wake up your display.

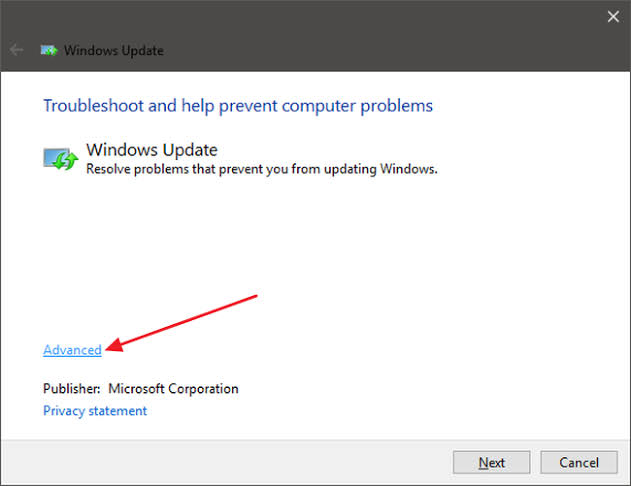
find the solution of Black screen windows 10 issue boot your computer safe mode.

Booting your computer safe mode start windows 10 in the boot mode only essential programs and apps running, then it works and you find the problem, what is the problem your computer.

Next, press the shift key, and hit the power button at the right side of the bottom screen, after that choose restart.

If you not seeing anything your screen and your screen is black, next to the press the power button and reboot your computer again. Perform the next three-time it will perform the Windows 10 automatic repair function. follow the steps is given below.

  • Hit the advanced startup menu, after that click Troubleshoot.
  • Hit advanced Options.
  • Choose Startup Settings.
  • Hit the Restart tab.
  • In the startup settings, press F5 or 5 to go Safe mode with Networking.

Reinstall your Video driver

If the problem with your screen then disturbs your video driver trouble, so better idea to attempt reinstalling.

  • Press Windows key + X and select Device Manager.
  • Choose display adapters, right-click display adapter and choose Uninstall.
  • Click ok to confirm, after than uninstall the application.

Your Computer will automatically reinstall the display driver either it boots up again If find any issue it was fixed.

If you want to know about the other way, Then go to our website and please read the full article. If you fail to do it then you can contact us a technical available 24/4 in customer help. In the help of “Black screen of death on windows 10“.

How to Fix YouTube Not Working on ROKU

How to solve “Youtube Not working on Roku” see details given below:

Fast View: Roku also provide full access of youtube all video without any disturbance and login, and if you do not require create or sign in to a YouTube, However, you login into Roku and linking your YouTube account, then after your viewing experience is much better. You can also you full access and you view your playlists, watch history, and see your subscriptions list. If you Signed in or not,  Roku channel will give recommendations under the series of Music, News, Gaming and Movies. But sometimes you facing Youtube Not working on roku.

If you visite a browser and find or search to be frustrating on the Roku application, then after you pull out your device or Smartphone, tablet and try to use the ‘Send to TV’ function. You find a small casting icon showing every video on your smart device, after your YouTube account linking the Roku. you just need to click in this icon and video will quick play on your TV through Roku. Your Smartphone will convert a remote and control For your Roku Device YouTube Channel. 

Experts find the problem and saying in these types of issue are created bad connectivity of internet problem with your smart TV or Box it is automatically some time goes to black and your YouTube channel is freezing while playing the video. If you find the solution of these types of issue flow the given steps below.

Your application is freezing in the video playing time, then you first disconnect power on your Roku Box. In this, your TV will turn off. Retry after 5 to 10 seconds and you try to turn on and replug all power connection. And your device will be starting rebooting now. In this process can be solved many issues in a single process. many time you start rebooting your device and it’s working properly. 

In these types of issue is showing sometimes your Roku version or a low price device and not powerful equipment. The more chance of likely to be run into the problem and bug in the device. so you have to remember the steps of the solution then you have Roku stick and some kind of low-cost model. 

You check and a good connectivity internet connection is available. That means your Wi-Fi signal is excellent rang in the term of the signal.

Go to setting and select the network section through the Roku remote. Click OK it will take a few secs to check your connection.

After that everything is load properly once, then you can check your network signal in the right bottom of the screen. Without any interruption load YouTube video and play properly. poor network signal is, not proper streaming high-quality videos.

If you want to know about the other way, Then go to our website and please read the full article. If you fail to do it then you can contact us a technical available 24/4 in customer help. In the help of YouTube not working.

How to fix Windows Update Problems

In this troubleshooting, we discuss some methods to solve to the end-user to Windows Update Problems and update the windows or installing updates or solve the windows update errors or another issue related to windows update.

In many Windows 10 PC User or owners are look over different problems during the time of installation of a new critical windows 10 update and get the update installation error “Windows won’t update” or “Windows update stuck“, windows does not support to solve the problem. (I do not understand in this updating a system the work simply should be taken so the time is taken and often not completed). sadly, there are more ways to solve this issue maybe the time of updating and updating windows 10, so we are writing here how to solve Windows Update Problems? in this guide are including some the methods that I have used from time to time to settle the similar issue.

In these ways to start troubleshooting ways and fixed the issue to Windows 10 update and upgrading problems:

Windows update stuck.

Windows 10 Upgrade Installation is freezes

Windows installation Error: Windows Installation Has Failed. 

Properly update to Windows 10 unsuccessful to install.

Windows 10 update interrupts to install.

Windows 10 is not able to completely update the installation.

Windows 10 is not fetching or download updates.

In this ways is Solve Windows 10 Update or Upgrade Issues:

Note: You follow the instruction to before solve the issue below to troubleshoot Windows 10 Upgrade/Update, continue and apply the succeeding and go next to attempt to update Windows 10 again.

Step 1. Conform first you have login in with an account and enter privileges.

Step 2. Ensure that your Time, Date and Regional setting are right.

Step 3. In your device encryption is on or enable first, you decrypt the C drive, and next to proceed to install the update.

Step 4. Go to Windows Service and open it and select start Automatically at Windows Startup.

Windows Update

Windows Modules Installer

Cryptographic Service

Application Readiness

Background Intelligent Transfer Service

Step 5. You must conform and disconnect all the secondary devices you do not need as like USB Driver, Printer, USB wi-fi Network Card, SD Cards, USB Wireless Mouse etc.

Step 6. After that, you must conform Developer mode is off.

1. Then after select Settings Go to Update next Security next for developers Sideload applications and select Yes to confirm.

2. Again Go to Settings > Application > Manage optional features > Windows Developer Mode > Click Uninstall.

3. After that, you Restart your computer and then attempt the update.

Step 7. First, confirm your computer is also free from malware and viruses. To manage a task this task you can use this check you Virus Scan and Removal Guide to examine the remove malware or/and virus Application that may be scanning on your PC.

Step 8. Go to Control Panel and select Power option and set the computer select Sleep to Never and disable the Fast Startup.

Step 9. you must be sure your disc space is free at least 30GB Space is available.

Step 10. You remove all useless files and Cleanup your Disk Space.

Step 11. You must conform and download and install the updated version of stack update, for window 10 version and architecture 32 or 64 bit. you want to check installed windows 10 version, go to Start Setting System About.

Step 12. Update important device drivers. Go to your hardware’s vendor Support and check download and install the updated drivers for the VGA. Also, occasional you need sometimes uninstall and update your VGA driver and system BIOS.

Step 13. You disable all temporary security scan software also all Non-Microsoft security software as like antivirus, firewall, anti-malware, etc, because to avoid similarity issues with the brand new windows updates.

Step 14. You confirm and disable setting the BIOS security Boot.

If you want to know about the other way, Then go to our website and please read the full article. If you fail to do it then you can contact us a technical available 24/4 in customer help. In the help of windows update errors.

How to fix Kaspersky not working issue

Know-How to Fix Your Kaspersky Antivirus if Stopped Working?

In day by day increased database cybercrime and threat to your data and you fill helpless and prone to risk. In this think, a company introduced anti-malware software to provide the security to your database and virus and another third side that may be injuries. The title of this software is Kaspersky antivirus security.

In this application developed by America and has few integrated processes that provide the security of the computer with a third party and any other malware. After that introduced, it is favourite of one demand antivirus application that for users. In this application is the user-friendly interface as like smart functioning and simple commands interfaces. Kaspersky Not Working is not a big issue. And users preferred to this software to protect all kinds of their important and personal data from infections. Kaspersky Antivirus Support and protect and recover all kinds of loss of all-important fills recover and scan virus and other malware.

Important discuss for Kaspersky not working

In this application, a user can be needed to log in the user name and password will be required and remain personal security Id. It Is disappointing Kaspersky Not Working. Let us go to study what is a reason and find its solution.

  • Its may be possible your antivirus software is not updated.
  • It’s maybe your subscription need to renew. it may be expired.
  • It’s maybe, Your windows must need to update.
  • Otherwise, you have an issue in your internet connection.

Find the solution for fixing Kaspersky Not Working or You have to need Kaspersky Antivirus Support

Then you do not know to Kaspersky antivirus not working certainly you find the solution and fix it. If you are facing some issue to finding its solution and try to solve, then you do not need to panic. Here you find the solution just need to further read.

  • You need to check your antivirus application Kaspersky Software need to update the latest version. You use the old version of the software might be a reason to not work.
  • Otherwise, you must confirm and check your Internet connection to work properly or not working.

You must be sure your date and time are right.

Starting the solving the problem or start troubleshooting, you must confirm the time and date is correct because Kaspersky is depended on your computer date and time to download the application.

Steps of repair Kaspersky Total Security

If you want to reset and restore the default settings in anti-virus Kaspersky Total Security, Go to Setting and then open the application’s in main windows, after that hit Manage Setting and choose the option Restore Setting on the Drop Down Menu. After that new windows appear and open the restore Settings wizard and you will easily reset your application configuration.

If you find the Kaspersky is not working, Kaspersky not start, or not working correctly. in this way, you need to repair Kaspersky Total Security. Please visit our website to read the full article,

If you need any further assistance, you can contact us a technical is available 24/7. In the help of Kaspersky Not Working.

How to fix mac sound not working

If you found the Mac Sound not working. Don’t worry about this please follow this given instruction to solve it easily. Macs users are found these sound and audio problem is common. If you are coming audio bugs after upgrading your OS (operating system) after that you install a new sound device or you change between Applications. Simply, most of finding these type of problems are solutions are available it is very simple you press the un-mute icon or balance your audio settings. You flow the given some steps to fix it easily and you got your Mac sound working correctly again.

Firstly, You check your Volume and hardware components.

You make conform and see your computer sound is not muted. It may find exact, but you easier find and you save wasted of hours of time. you just need to click the mute and unmuted button and test it you increase and decrease the sound volume. You have plugin external audio device or headphones it is a good time to check out they have blown out. 

Select the Right Sound Device

If you try an external audio device or headphones attached and you are not hearing anything. This is common bugs in the Mac. You did not find the exact reason, occasionally your Macs you select the wrong output sound device when the time of installation or attache a new one.

Flow these steps to fix it. 

1. Firstly you go to the Apple menu and select System Preferences Sound Output.

2. Choose the Right Output Device for Your Sound.

3. In case of you, already selected an audio device, then you selecting a different sound device and after that, you re-selecting the one you find the solution to the problem. It is the right one, after that, you can try to reconnecting and unplugging your sound devices. you sure to uncheck the mute option and tune your output sound devices.

Reset Present Sound

This problem does not solve, In this problem is one of Mac’s audio interfaces, Maybe these results are including some error, hidden or prevented sound. You need to reset the low-level Mac audio API, Genuine Audio commonly fixed these problems.

1. Hit on the Spotlight search icon and find for “Terminal.”

2. Go to Terminal and type:

3. You just need the reset the API, After that you sure to test your sound is working correctly.

Shutdown Your Computer

Occasionally the resolution to the sound problem is as simple as turning off your Mac and turning it on next. After that, you not hearing the sound of your sound quality is poor, you just need to completely shut down your Mac. As different a restart, Your computer is Shut Down the RAM processes completely clears, You do solve the common slack sound issues.

 Zap the NVRAM

You Just Restarting or zapping the Non-volatile random-access memory (NVRAM) can potentially resolve the sound issues.

1. Completely Shut Down Mac.

2. Next to Switch on your Mac turn on and press hold the Power Button.

3. Press and hold command + option + P + R until your Mac Restart.

If you are attempt this option, remember that zapping your PRAM/NVRAM will comeback your startup disc, audio preferences and time zone to go to the default settings.

If you have to try to cover the solution to the problem. and you not able to solve problems with sound. If you failed to solve “sound not working on mac” please contact us for further assistance.

How to Uninstall Microsoft Office 365?

If you success full install Microsoft Office 365 in your computer, If you uninstall Microsoft Office 365 there is a lot of reason. Maybe, If you are an attempt to Set free up an excess of Office 365 to any other computer or device, perhaps not working properly and you are attempting to reinstall the software to correct any issues, you only do not equally product and then you try to run down to older or previous version or you try to uninstall it always.

I don’t know what is the reason, there are some ways to uninstall Microsoft Office 365 from your device or computer.

In this article, you will do the How to Uninstall Microsoft Office 365? quickly from your device or computer.

Method 1: Uninstall Office 365 from Windows 10 through Settings.

Flow these steps to uninstall Microsoft Office from Windows 10 through Setting given below.

1. Go to Setting

2. Select on Applications and Features.

3. chose the Microsoft Office 365 installation, or chose an option suite of a name like Microsoft Office Home, or Microsoft Office 365 and Student 2019.

4. Hit the Uninstall Tab.

5. Hit the Uninstall Tab again.

6. After that, you complete this task with continuing on-screen directions. 

you complete in these steps, then your device or computer the suite of Office application will not be available.

In another option, On older version of the Operating System (OS), Go to Control Panel and select Program and Features select Uninstall Microsoft Office 365 or suite.

How to Uninstall Microsoft Office 365 completely using the easy fix tool.

You will be using an easy fix tool and fastly you speedily uninstall Microsoft Office 365, Office 2013, or Office 2016 from your computer in this facilities provided by Microsoft.

Flow these steps to ‘Uninstall Microsoft Office 365’ using to tool:

1. Firstly you Download Office easy fix tool through Microsoft.

2. After that, you launch the tool double click the file.

3. Hit the Next tab.

4. Select Yes to perfectly uninstall the suite of Microsoft Office apps from your computer. 

Microsoft Office should be permanently removed from your computer, after that, you can flow on reinstalling Microsoft Office 365 from your Microsoft Office Online account or step by step manually install Microsoft Office 2016.

You can not uninstall single or individual applications anymore according to worth pointing. As like Exel or Word, Using Microsoft Office 365. and how to we do remove an individual application. It does easily than you buying the standard version of the suite.

Method 2: How to Uninstall Office 365 from Mac.

You flow these steps to easily uninstall Office from your Mac Computers such as Exel, Word, PowerPoint, Outlook and OneNote. Firstly you Signed in as admin on your Mac using user name and password to complete these steps.

Remove Office from your Mac apps.

1. Firstly Open Finder select applications.

2. Command +click to chose all of the Office for Mac apps.

3. Ctrl+hit apps you select and hit Move to Trans.

Go to Library folder and delete files from your user

1. Go to Finder, press Command +shift+g.

2. Appear in these windows, enter ~/Library after hit Go.

3. Go to the Containers folder and ctrl+click here move all folders to Trans.

4. After that go back to Library folder use the back arrow and open Group Containers. Ctrl+click move all folder to Trash.

Delete from Dock and restart

1. If you put Select each one Office apps your Dock and ctrl + click Option Delete from Dock.

2. After that, you restart your Mac to permanent Uninstall.

If you failed to How to Uninstall Microsoft Office 365? please contact us for further assistance.

How to Create an apple id?

If you use Apple online services you required an Apple ID, In this Apple ID you use Mac, iPad or iPhone. it’s very simple. How to Create an apple id?

You can not access all services of Apple services and products without the help of an Apple ID. Happily, it is very simple to create one. In this article, we discuss here how to create an Apple ID for anyone or a child, as sensible with set up strong security and attach Family Sharing group. For more details on Apple ID account setup, read How to change an Apple ID and How to use an Apple ID account.

Firstly go to Apple website and  Visiting Apple’s ID part then after clicking and Create An Apple ID.

https://appleid.apple.com use in this link and flow the instruction and easily creating Apple IDs on the web portal and manage it.

It is not required Apple ID to link Apple product. If anyone allowing to create an Apple Account or you are windows user or Linux user.

You get a free iCloud account to limited access in you use to online versions of Keynote, Page, Numbers and your have 1GB of Free iCloud storage to boot. But, aside from using this storage space from the foregoing web-based apps, you are not able to access another way for example, through the iCloud Windows for Windows app – need first you link the Apple ID to an iOS or Mac device by signing.

Limited accessing online iWork tools. Without you do not link your Apple ID to Mac or iOS device. Then you want full access iWork tools to link it.

you creating for Apple Id. have provided an email address for your username. But you know this is not existing email account that’s given by Apple, and it is not truly previously used for an Apple ID.

Do not provide wrong details because a verification mail will be sent to your email address, and you open first you verify the given link in your email address after that you able to log in Apple ID opened for business.

Next, in case of your application in down in future, you have required another email address for secure your account for resetting your password. In this email address, less use or rarely and this way use Apple ID. You could give the email address of your family member, as well spouse. Verify this email address using a verification link.

Provide the date of birth to create on Apple ID, fill in all details and security questions, and provide your mailing address. Do not fill any false information because Apple will be using your all the details again conformation.

Correct ways, you Provide the correct country and enter details seeing that Apple runs various programs separately Movie, Music and App Stores for apart region. If you live in Antigua but you provide Birmingham then it will difficult when you will provide details of credit card details to purchases. your billing address is different. you will be limited to selling through Birmingham’s local iTunes and Apps Stores.

If you failed to create new Apple ID in this procedure flowing the guide. please contact us for further assistance for Change Apple ID.

How to change Apple ID

How DO I Change Apple ID on My iPhone?

What a Problem! If you go to Setting up your Mac, iPhone or iPad, and it demands your Apple ID. The beginning goes wrong and It so difficult to generate a new Apple ID or changing is show difficult old one to a new email address. Rest assured and breathe deeply: In this Given article, we discuss how to change apple id So you can start Mac or iPhone. 

Also, a good little help article available on the Apple website. If you have already available apple id 

and password then you can Successfully log in on the ‘My Apple ID’ webpage, and that the email address you are changing it to is not already in use.

In this article easy to compare to your Apple ID Email Address for a process that’s so easier than Apple’s. But this is not probable you are here. one of the given reason to you is here one reason.

You are deciding to change your current Apple ID to a new email address.

If you want to try to create a new Apple ID but your Mac or iPhone says ‘That email address is already used as an Apple ID’ then you have no concept what is my password and you just a create a start fresh.

Then you had  Apple ID and you do not remember what is password.

Maybe it happens sometimes.

Some on worked in apple Store has seen this mays time as like 1000 times or more. One of two reasons happen.

A new customer will be set up or create a new Mac, iPad, or iPhone and then go to setting and creating an Apple ID. After that fill in all their information, press ok, and it does not work.

An old Apple customer is trying to change their Apple ID from an old email address to a new one. that customer tries to how to update it, then Mac tells them these email address is already in use.

What you need to know before you Begin

Different Accounts whit Different Passwords

Apple IDs are continually linked with an email address, but the Apple ID and the email address are connected with the proper separate password. It’s maybe confusable because both user names are the same (for example, youremail@gmail.com) but both accounts are separate. The Only difference is if you will create a new email id in iCloud Email address (ends in @icloud.com) when you create your Apple ID.

In this word: If you know your Email password, but you Apple ID Password may be fully Different. Maybe in this same, but only if set them up that way where you created both accounts.

Firstly, you conformed your an email ID and Apple ID linked together.

Apple sends a confirmation email to the new Apple ID’s  Email address as the initial part of the setting process. In case you have received verification link email but you not verify it then you will not able to use this Apple ID.

For Example, If you are choosing an Apple ID for kevin@yahoo.com, make conform you log in to kevin@yahoo.com on the Yahoo! Mail website then after you proceed. Memorize, both are same they have the same user name ( the Email address), but both accounts are different password.

If you failed How to change Apple ID in this procedure flowing the guide. please contact us for further assistance for Change Apple ID.

How can I SET UP CANON WIRELESS PRINTER?

Guide for Canon Wireless printer Setup.

Some router and hubs are available Access points. In this router and hub is feature an automatic link Button labelled ‘WPS’ provides the Wi-Fi Protected Setup.

In this type of router and hub are provide the facilities to connect PIXMA Printer to your network. Without and password required and easily enable it your connectin your device.

you can use this method and connect PIXMA Printer easily. So If your access point has available in your router device use WPS button. You can use this method please select ‘WPS Connection Method’ flow the given below instruction.

In case of your access point does not Support WPS Please flow another option is given below. you to connect your PIXMA Printer to flow this ‘Standard Connection Method’ below.

Method to connection WPS

There are some rules you must flow before you start to must be met to use the WPS push button method:

In this router, the access point has to physical WPS push button available. Sure please check your device’s in the user manual.

If you do not find the push button please flow the given “Standard Connection method”.

You must be using WPA2 security or WPA (‘Wi-Fi Protected Access’) protocol. Mostly enabled access points to use this protocol.

Step 1: You firstly sure the Printer is turned on.

Please press and hold the (wi-fi) key on the top of the printer until the alarm lamp flashes once.

Step 2: You must be sure in this lamp next to this key starts to blue flash and you go to your access point and press the WPS Key within 2 minutes.

How to access WPS On your access point. please see this details in your user manual.

In the blue wi-fi lamp on the printer will find the network is continuing flashing, its search, and wi-fi and power will flash again and again when connecting to the access point.

and next to, your printer and wifi network made a connection successful. the power lamp and wifi lamp will stop flashing and remain it.

Confirmation your network setting

after that, your printer has successfully connected that your wireless network is able to print. you can take the print out the network settings of your wireless printer.

  1. If you first confirm your printer is turned on.
  2. Then you confirm the Load the sheets of A4 or your required size of plane paper.
  3. You wait for the 15 times alarm lamp flashes to Press and hold the (Cancel/Resume) key. and after that release it. Next to the network information page will be printed.

In the discussion about the printout, you sure check the ‘Connection’ indicates “Active” and that you can set the SSID Service Set Identifier (name of your wireless network) and Specify the correct name of your wifi network.

This ends the WPS Settings mode.

If you take the highest benefits of software next to makes the most out of your ‘PIXMA MG3540’.

If you have no Installation CD avail on this related product. To continue this process you must be download software to continue it.

If you failed WPS wireless in this procedure flowing the guide. please contact us for further assistance for Configure canon Printer.

How to Disable Flash Player on Mac

Here given Step-by-Step Two Quick Ways to Uninstall Adobe Flash Player on Mac.  

In your Mac, Are you tired seeing these types of Update? Some users Mac Adobe asks you to download and install an update to Flash Player because of some updates and significant improvements in new updates?

Long-time ago, Adobe gave good news for Adobe flash players user to a major security vulnerability, In this discovered by Trend Micro and Reported BGR. In these not to complete attackable or compete secure. because of Abode time to time updates, the software and app and the new version of Flash player software and app are launches. 

If you want to Update Mac to some Clicks follow these steps and easily you How to Disable Flash Player on Mac. In this process is boring and more time taken unnecessarily. In Old Days we had to use Adobe Flash Player to view netting Videos as these are mostly inscribed in Adobe’s proprietary Related Flash Setup.

No those were the old days, In this 21st centuries there are many moderns browsers are available on the Internet as Chrome, Firefox, Safari and so on. Youtube, Dailymotion, Vimeo, and So many other live streaming netting services. So leave the table run out, the flash player.

So, If you want to cancel your Adobe Flash Player from your Mac so you uninstall flash player. You won’t be concerned about your self-updates and potential security issue.

Read in this article, How to Disable Flash Player on Mac

Note: two methods are showing below in solve it.

Method 1: Uninstall Adobe Flash Player Manager.

Here, we are providing the details of Flash player version 29 in related on Mac OS High Sierra. Maybe your running old version of Mac OS or running outdated version of Adobe Flash, So Minor changes may apply.

Step 1: Go to Mac your Application Services and find this app “Adobe Flash Player Install Manager”. Hit to run it.

Otherwise, you can use the quick search on the spotlight and select the ‘TOP HIT’ result.

Step 2: After that hit the Uninstall tab in the new window called “Adobe Flash Player Uninstaller” then it says you will remove Adobe Flash Player in your computer.

Step 3: you will be using Mac user name and password to help of install helper in your Mac. Myself it’s very painful to say to you but no option is available to avoid installing the Adobe helper tool.

Note: In this tool is harmless by adobe in Helper tool. It’s general for a third-party app like Microsoft or Adobe to allow permission to ask the certain tasks in any removing items with particular permission to complete a task such as remove it. such as Mac App Store etc. as macOS has many limits to restrictions on this.

Step 4: Done it. After that, a new pops up windows you give the message it Flash was removed from your computer.

This is a good and recommended way to removed flash in your Mac. It should take complete the task less a minute to complete. you uninstall Flash Player, you end up with installing another Adobe application as like Helper tool.

Some Mac user is told to us it’s not able to uninstall Adobe Flash Player application. it’s not clear to cause of the problem. But In this Method 1 did not work your problem solve, try to Method 2.

For more information and read Method 2 visit our website to know How to Disable flash player on mac

Design a site like this with WordPress.com
Get started